-1
archive,tax-portfolio_category,term-steampunk,term-83,theme-stockholm,qode-social-login-1.1.2,qode-restaurant-1.1.1,stockholm-core-1.0.8,woocommerce-no-js,select-theme-ver-5.1.5,ajax_fade,page_not_loaded,boxed,wpb-js-composer js-comp-ver-6.0.2,vc_responsive
Finished Small Cabinet

A Curious Little Cabinet

Finished Smal lCabinet
As we have said before we like for the pieces of our lives to mesh together into a seamless whole. That is a work in progress but at least today we can claim some some progress on that front.


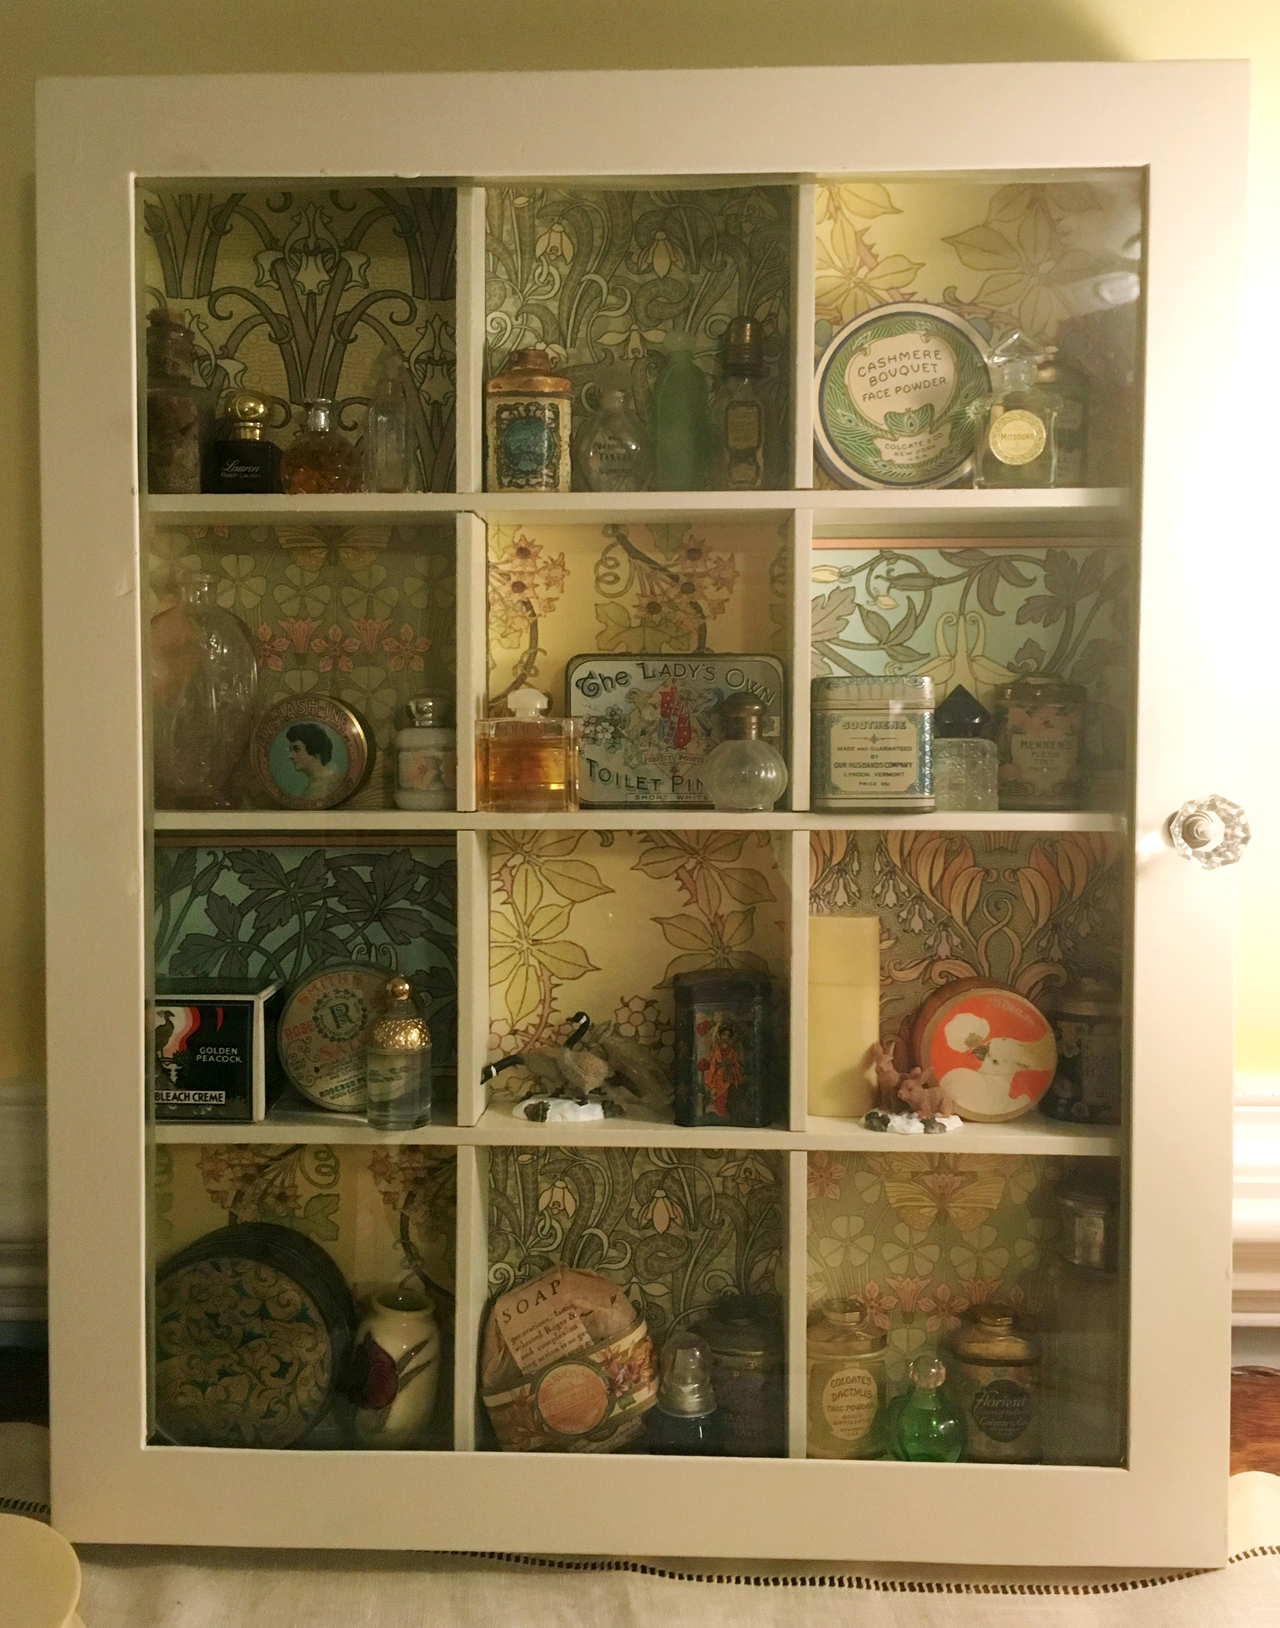
We had made some Orange Spice Room Spray and wanted a small cabinet in which to keep our essential oils. We have worked on small cabinets before as a way organize and keep safe lots of small collectibles. These cabinets came from Michael’s and it would be great if they brought them in again sometime. All we needed to do to the cabinet below was to print decorative paper from Dover Publications’ Art Nouveau Floral and Animal Designs CD-ROM & BOOK, cut it precisely to fit each section and glue it in place using a spray adhesive. The papers go well with the collection of sample perfume bottles and talc tins we have collected over time.


Art Nouveau Cabinet WEB
The second one was accomplished using the same idea. We used scrap-booking papers that we bought at Michael’s for the background in this cabinet. We wanted a more masculine look in this cabinet with it’s collection of sample medicine bottles and small tins so we used prints of old postcards and handwriting.Traveling Cabinet WEB


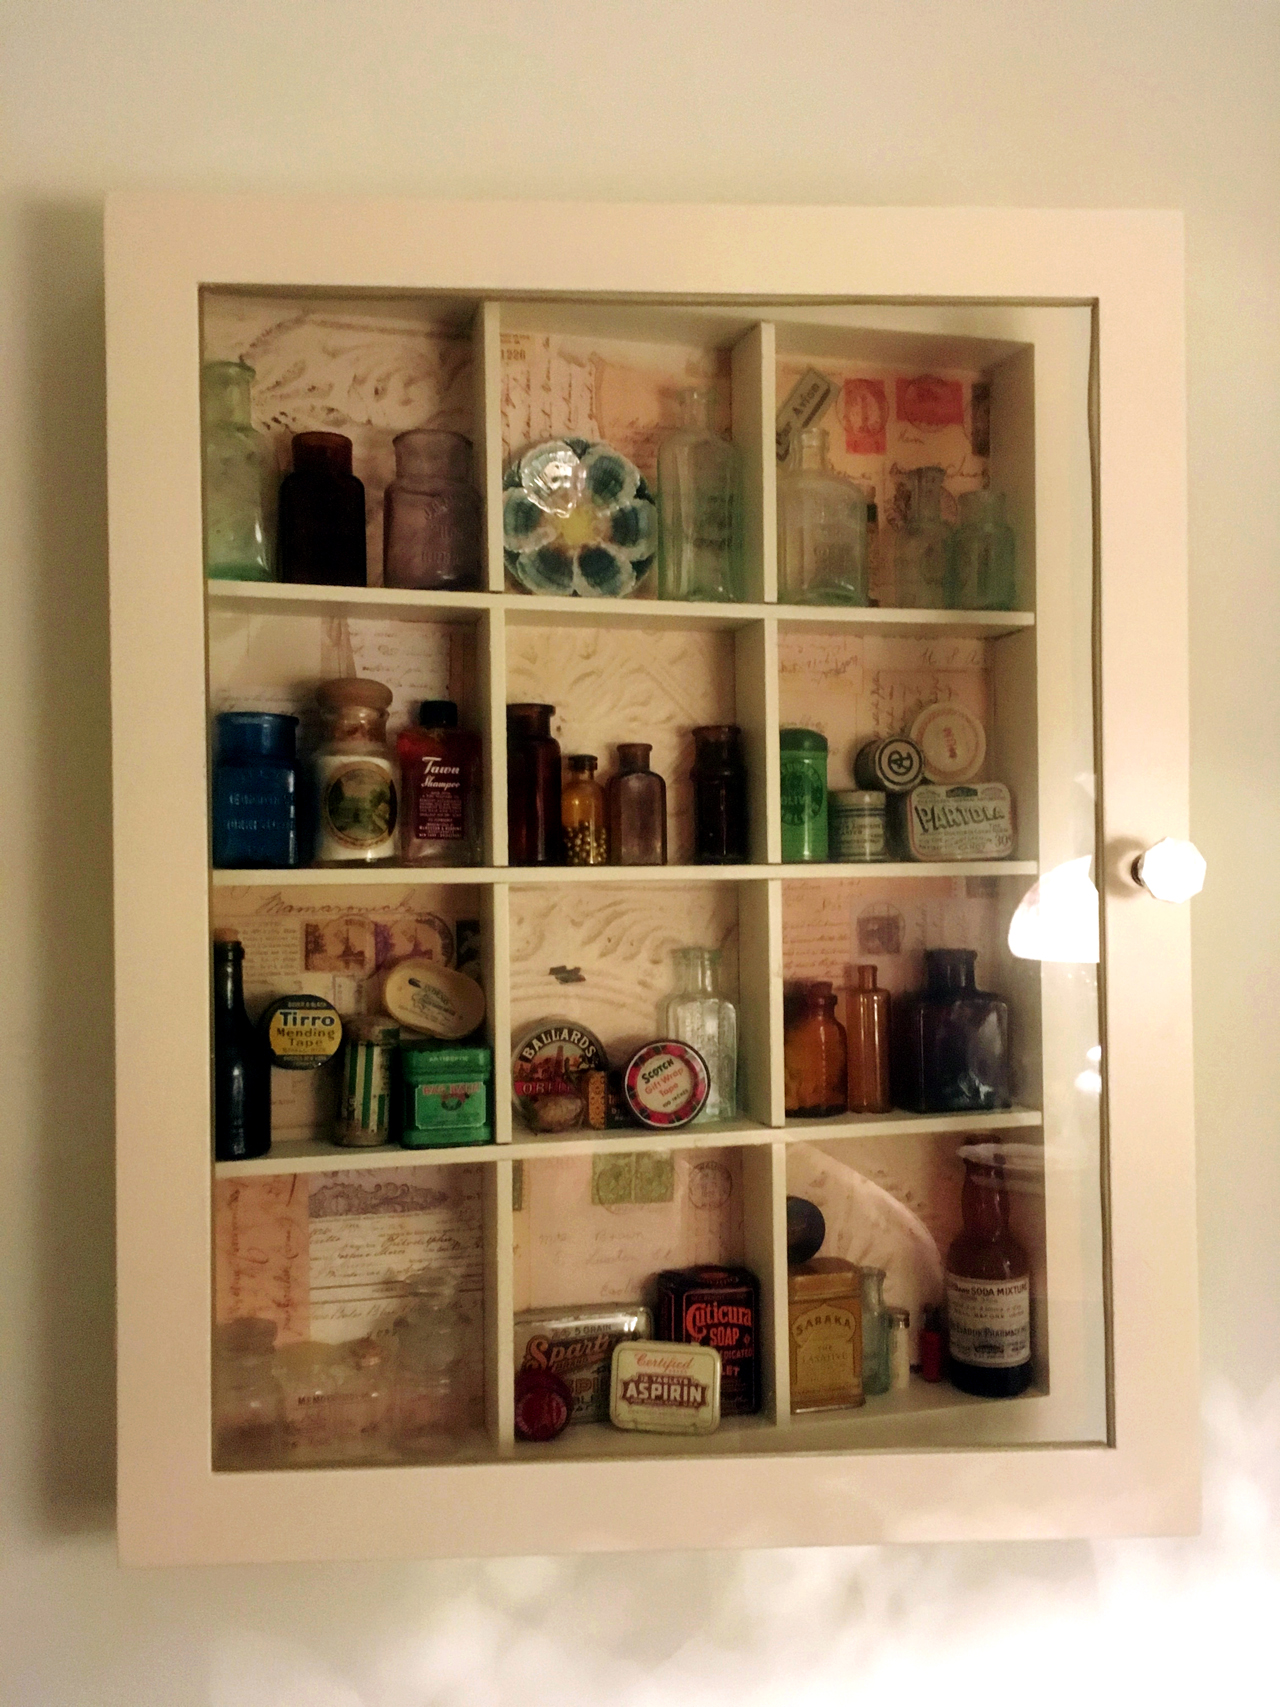
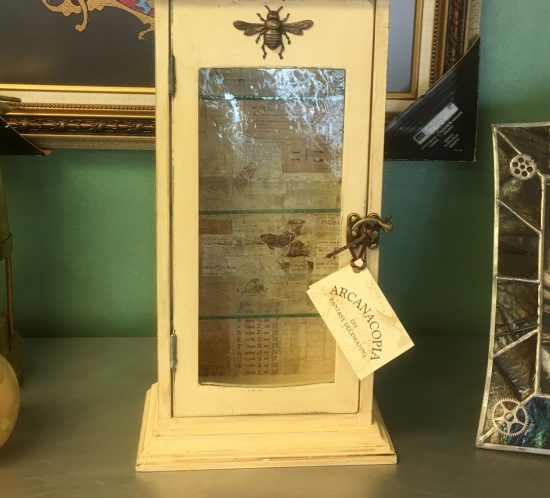
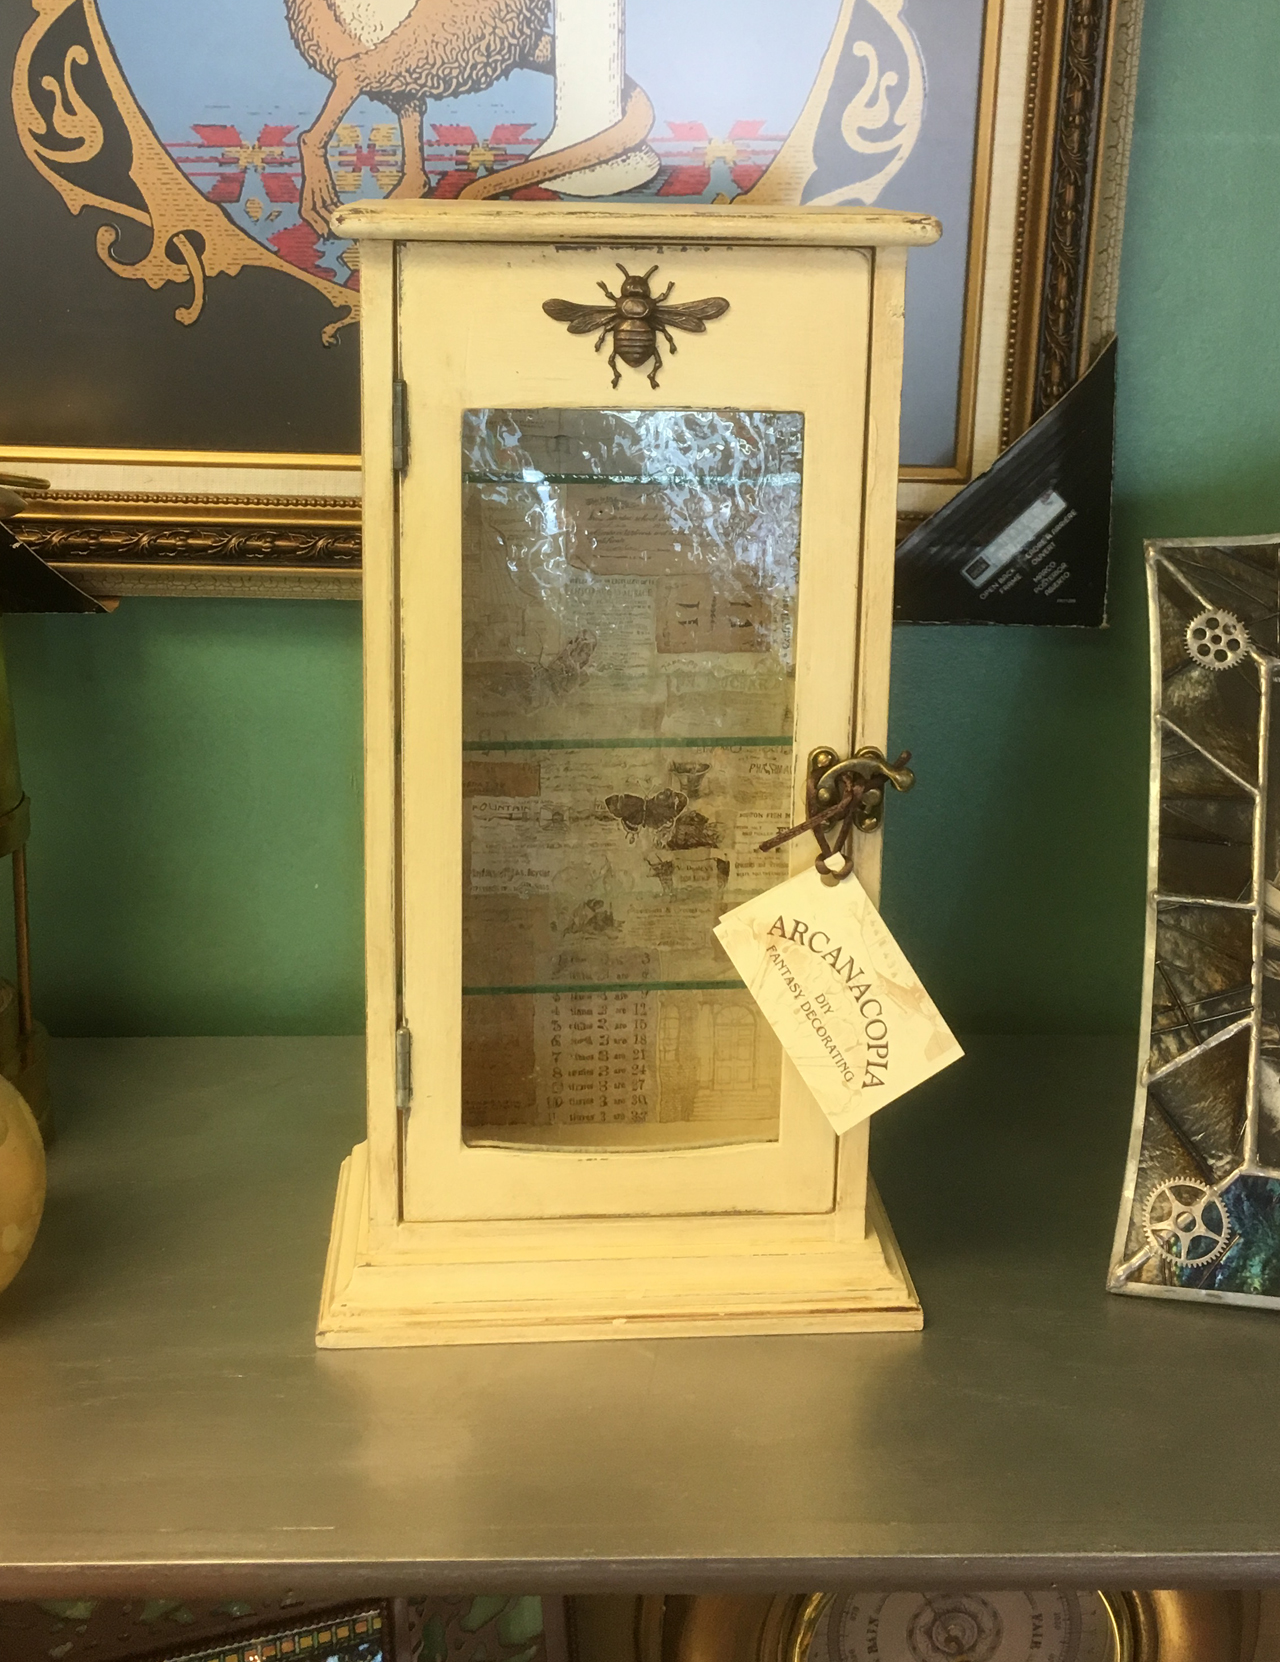
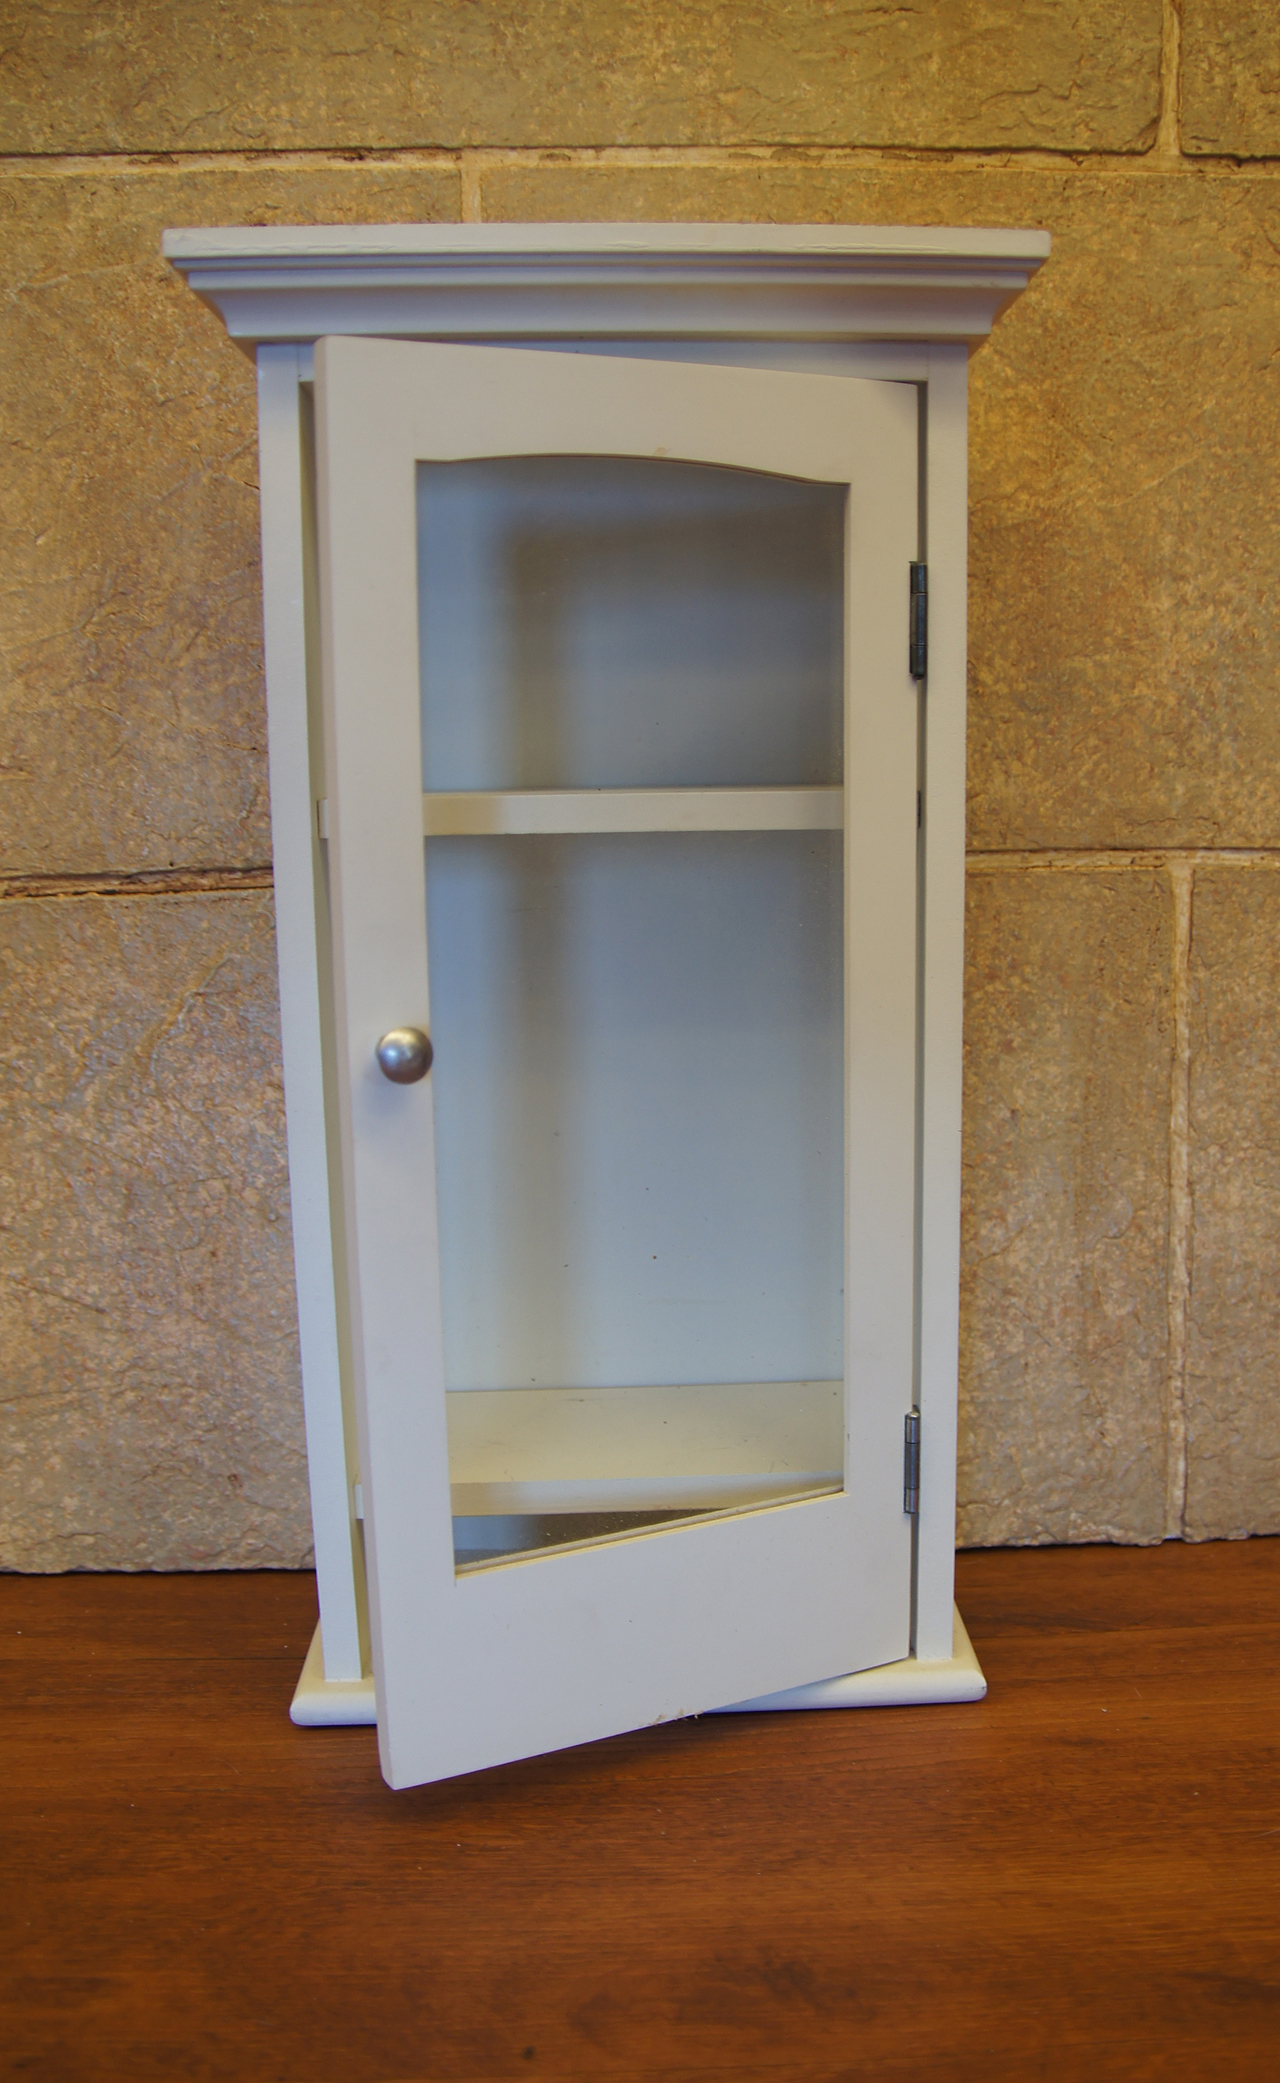
We wanted something small and lightweight for our essential oils cabinet in case we wanted to hang it on the wall. We actually found several likely candidates from our usual source (yard sales) and thought this would help us try out more than one idea.


The smallest cabinet came with candles and essential oils in it so we knew we were on the right track.
Original White CabinetWEB
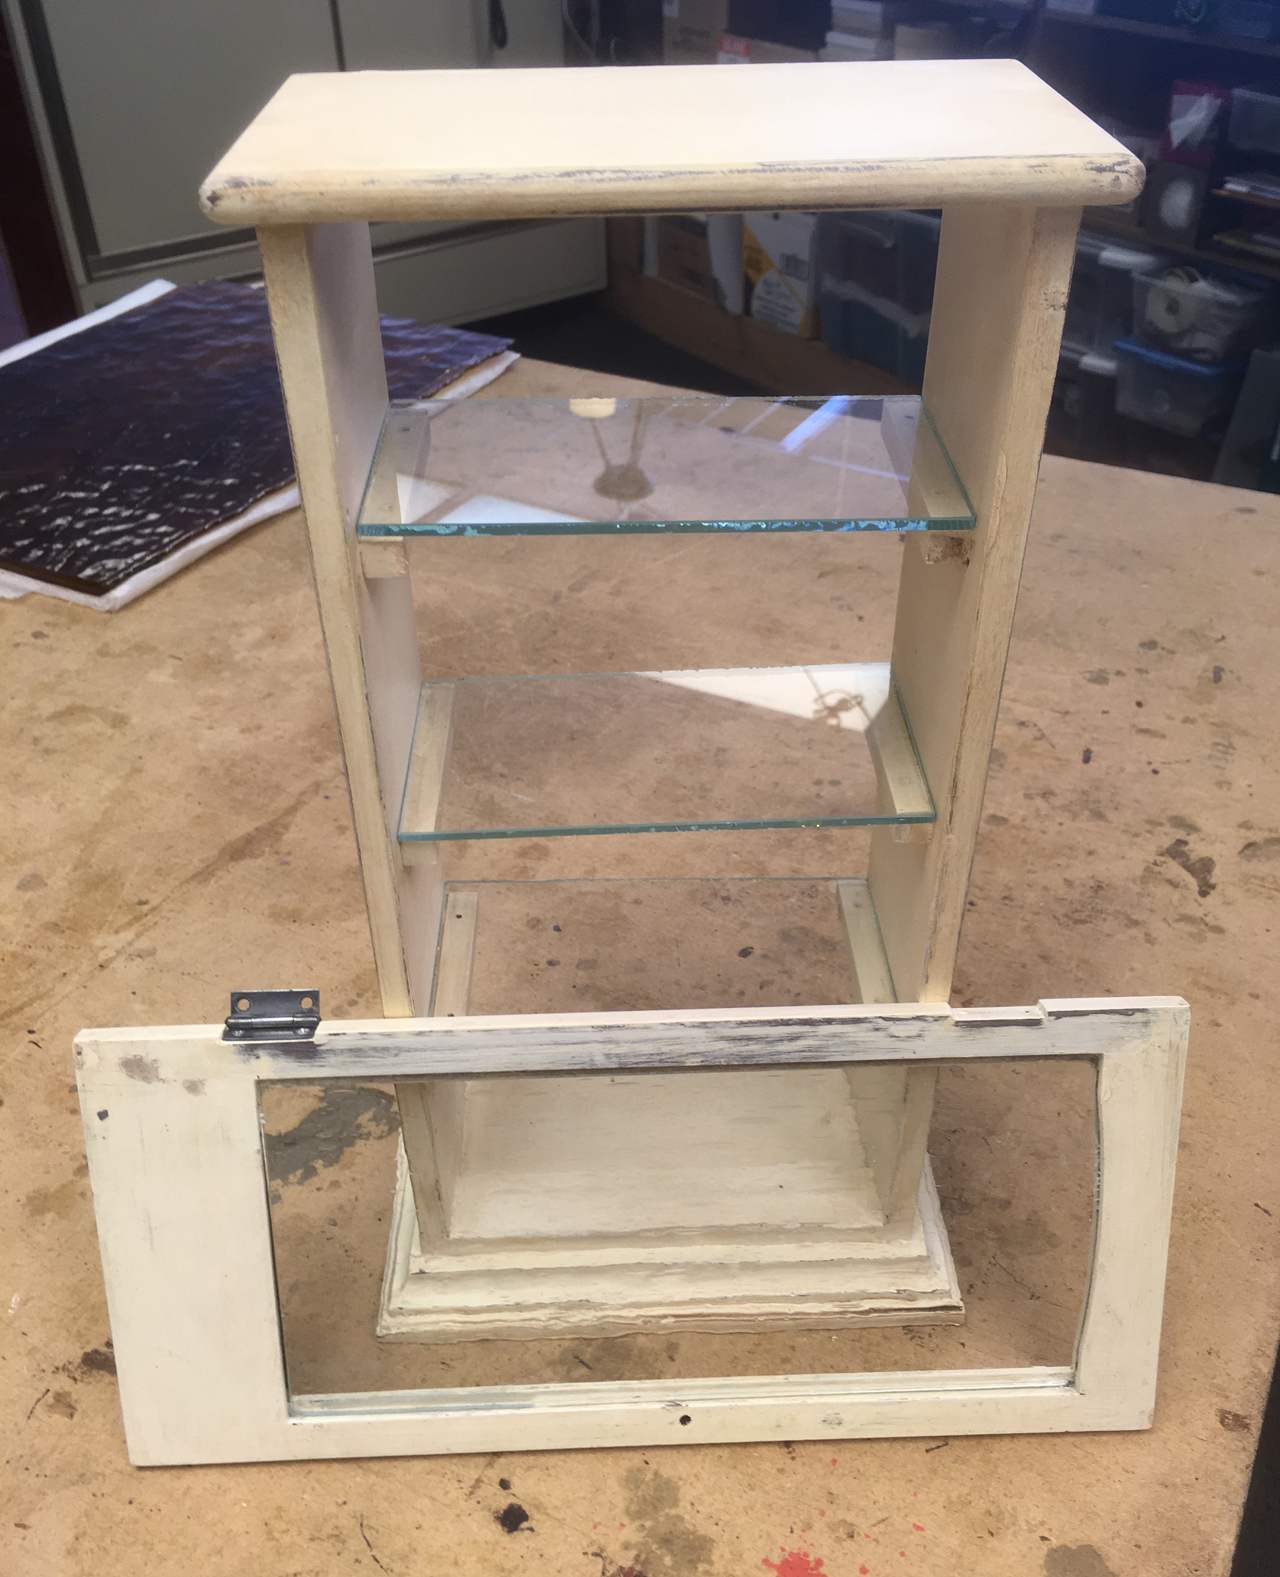
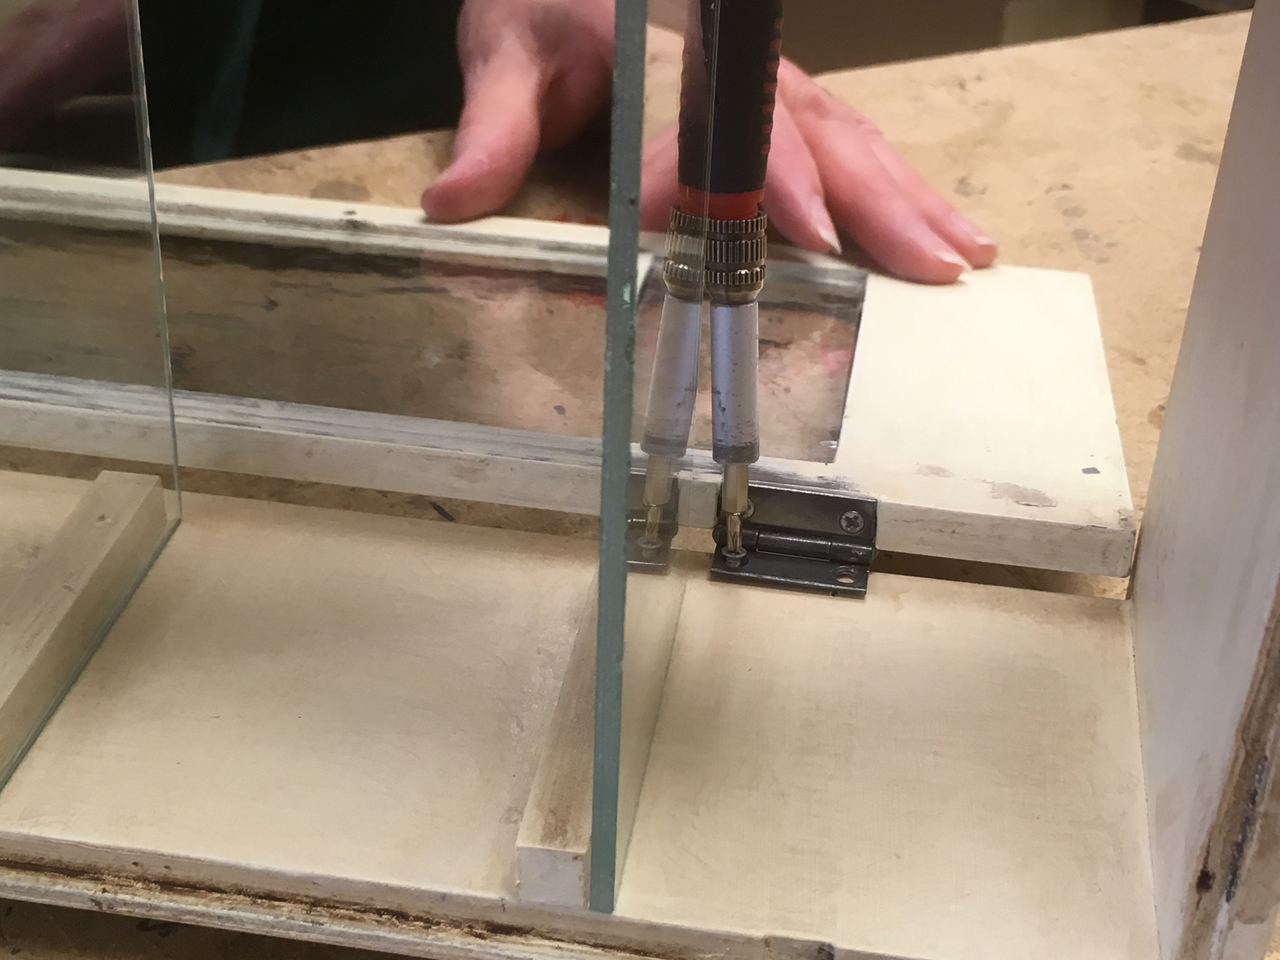
We took the back off of it and took out the shelves. We decided to change out the shelves to glass and put in three shelves instead of two. We cut up the original shelves to make supports for the glass shelves and glued them to the sides.


Brackets In Cabinet WEB
We traded out the plain glass in the door for an antique looking seedy glass. Look for pretty glass for small projects in stained glass shops – we just happen to be lucky enough to own one – Jomoco Studio.


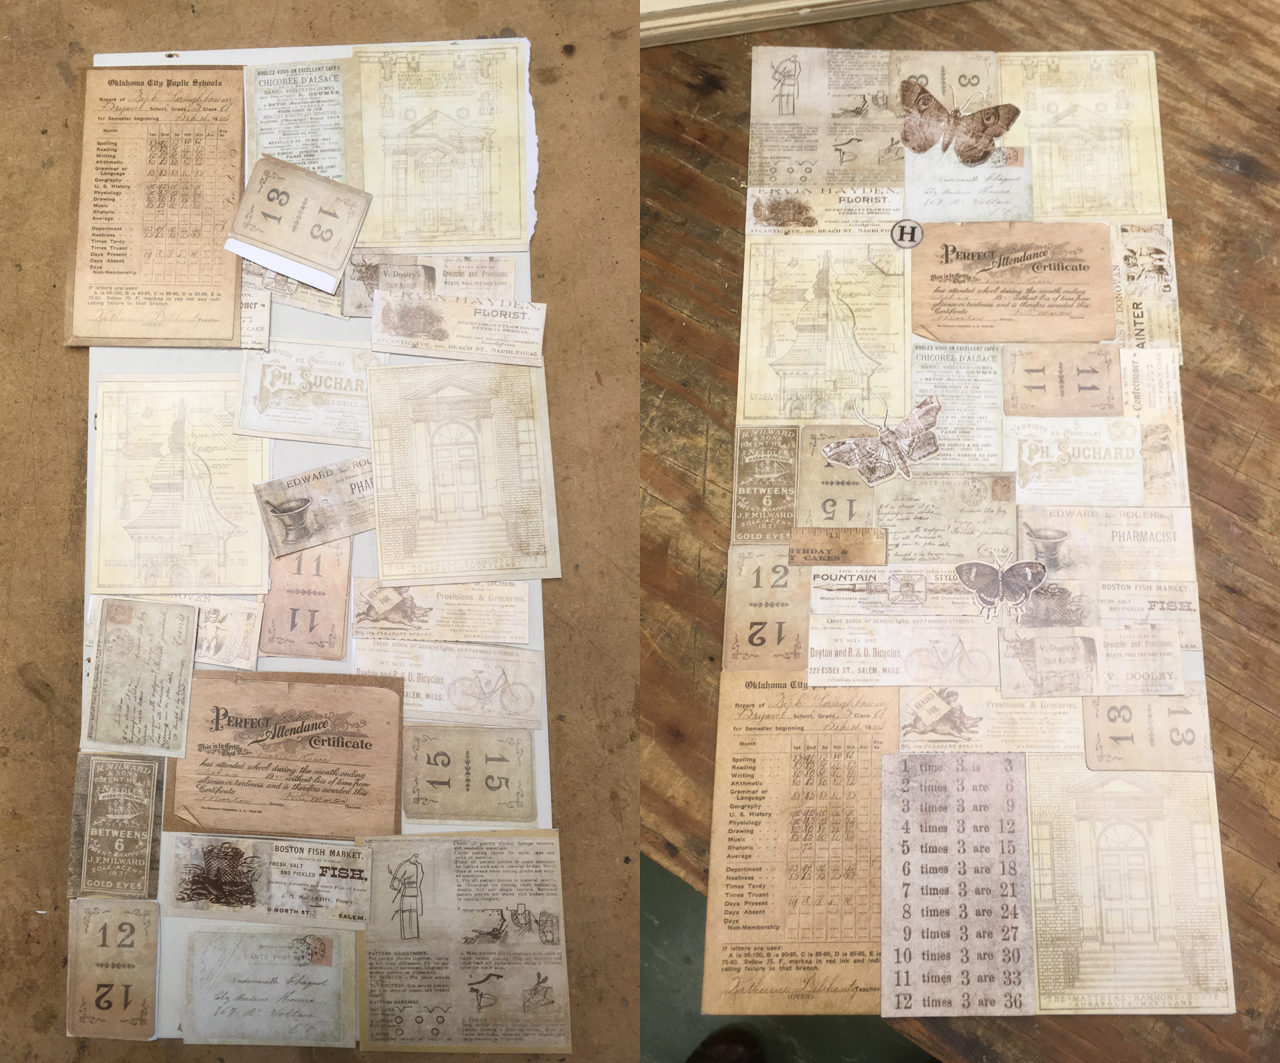
We wanted some antique looking paper for the back of the cabinet and discovered some really cool looking stickers from Tim Holtz that gave us the look we wanted.
PlayingWithCabinetBackgroundWEB
We used a de-glosser to prime the surface for painting then painted two coats of chalk paint. Since the cabinet was white the first coat needed to be a dark brown and we decided on a creamy off-white for the second coat. Then we gave the the edges a light sanding to reveal the dark brown. A light sanding is all that is needed otherwise you might sand through the brown.
Small items like this cabinet only need a wax finish to protect the surface. We wanted a lightly aged effect but nothing too grungy looking. We started with a clear wax to keep the next coat of brown wax from getting too deeply into the grain of the surface. Apply each coat of wax with a small rag wiping with the grain or in a circular motion.  For the last coat we worked in a coat of white wax which evened out the brown wax and made our piece look complete. Allow this to dry and buff lightly.
All that was left to do was to glue the back on to the cabinet, remount the door on it’s hinges and put a catch on the door.
Putting The Door Back On Cabinet


We’re very pleased with the final result. HOWEVER, we could not fit ALL of our essential oils in this cabinet, so now it’s up for sale in the shop and it’s on to the next one!


Smal lCabinet Finished Inside
Harry Potter finished "Painting"

From a Print to a “Painting”

Today we’re going to show you how we take a print and make it look like a painting on canvas. To demonstrate the final result, here’s our Harry Potter Destination Sign canvas:

Harry Potter finished canvas


You will need:

  • Antique style frames and canvases to fit them
  • Images from Dover Publications or unframed prints.
  • Mod Podge Gloss Waterbased Sealer, Glue & Finish
  • 1″ paint brush
  • pencil
  • ruler or yardstick
  • print-making ink brayer or soft foam paint roller
  • scrap wood blocks


We chose the prints for our Dragonologist’s Parlor that we’re sure any self respecting wizard who was interested in dragons would have chosen for his or her parlor. We found our images in several titles from Dover Publications. We recommend these titles for great magical images:
Dover Publications 120 Great Paintings CD-Rom and Book
Dover Publications 120 Great Victorian Fantasy Paintings CD-Rom and Book
Dover Publications 120 Great Orientalist Paintings CD-Rom and Book

Our Dragon Print
Our Dragon Print


The next step is to find old frames, especially ones that have extra sculpting at the corners, antique style. If they have canvases in them then so much the better. It is easier to find a canvas to fit a frame than it is to find an antique style frame to fit a canvas.


Once we have a frame and canvas, we then choose an image that furthers our design theme. You may have to find a copy center that will work with you to size and print color copies of your chosen images. Note: Printing your own images is less expensive than mounting prints purchased over the internet. Also the thinner paper used by copy centers works better than the heavier and higher quality paper of most commercially available prints. (We are lucky here in our studio that we have a large format plotter that we can use to print anything we want.) You will need to print the image so that it covers the canvas completely while cutting off as little of the image as possible.


The next step is to lightly coat your print with clear polyurethane spray. Mist it lightly with the polyurethane alternating from front to back allowing it to dry before flipping each time. This is to help stabilize both the paper and ink.


Once dry, mark out the edges of the canvas on the back of the print with a pencil where you want your canvas to go. Allow another inch outside of that for enough paper to wrap to the back of the canvas, then trim the paper.

Trimming the Print
Dang, this print is a little tight – you want to give it a bit more room.


Now get prepared to move quickly on this next step because Mod Podge dries in 15 to 20 minutes. Coat your canvas with Mod Podge Waterbase Sealer Glue & Finish. (We prefer the Glossy option – it seems to work better for this project.) Lay your print face down on the table and place the coated canvas on your penciled placement lines. Turn the whole thing over and gently roll out any wrinkles with an ink brayer or soft foam paint roller, working from the middle to the corners. The idea is to smooth out wrinkles gently so your wet image doesn’t get rubbed off. Allow your piece to dry thoroughly.


Next, we’re going to do the edges in two phases. First, coat the longer sides and a just bit around the corners of your canvas with the Mod Podge. Glue the paper to the longer sides, smoothing out wrinkles as you go.

Mod Podging An Edge Folding the Print Edges 1 Folding the Edges 3

On the ends, fold in the corners of your paper (like a present – see our picture) to stick the paper to the shorter edge corners.

Folding the Edges 2

You might want to place blocks or heavy books along the edge to help the print dry to the edges of the canvas properly. (The voice of experience says to be careful not to get any glue on your props.) After those two edges are dry, glue down the shorter edges.

Lastly, coat any remaining paper that might be standing up taller than the canvas edges and fold it down onto the back and weight it with the books or blocks to help it dry in place.

Once your paper is mounted coat it with another coat of Mod Podge. If you brush back and forth with small short brushstrokes you can make your print look more like a painting. Some of the canvas texture will also show through which adds a nice touch.

Secure your dried canvas in your frame and hang on your parlor wall! Or you can hang the unframed canvas if you are going for a more updated look.

steampunk cloche light

Tips on Creating Your Own Steampunk Lighting

We wanted to write some notes about creating Steampunk-style lighting. We don’t have many example photos yet and really, every lamp will be different. But the principles stay the same.


The initial creative process is one of pulling out all the pieces – parts that we have hoarded and seeing what works together. Steampunk style is made from components such as gears, gauges, clockworks, gas fittings and other industrial parts. These pieces are made of natural materials such as glass, wood, iron, and brass. These materials may show wear and tear, or be rusted, corroded, or otherwise show their age. But that is OK because a little rust here and there never hurt anyone.


That being said if the finish is too far gone we apply paints in bronze, rust, or other metallic colors. A coat of paint also unifies disparate elements. Paint any pieces that need sprucing up before wiring them together.


Decide what works together keeping in mind that we want good proportions and lamps that are not off balance or top heavy.


Most of our lamps have not needed complex wiring. Consult an electrician for lighting that needs multiple wires combined together.


Edison bulbs complete the look. They tend to get a little hot so use a  slide dimmer to keep the bulbs from getting too hot and make the bulbs last longer. There are even dim-able Edison style LED light bulbs available now. These solve the problems of excess heat and the burning out of expensive light bulbs.


Here are a few examples:


This lampshade is made from a child’s umbrella. We replaced the plastic with copper mesh then mounted it on an antique floor base. It is completed with Edison light bulbs and black crystal drops.

This lampshade is made from a child’s umbrella. We replaced the plastic with copper mesh then mounted it on an antique floor base.
It is completed with Edison light bulbs and black crystal drops.

A chandelier socket cluster up-ended inside a bell jar from Restoration Hardware. We used a variety of light bulb sizes for interest.

Pulley Steampunk Light

Steampunk Lantern Light

Steampunk Birdcage Light

Simple glass dome with an industrial cage light.