
A Wizard’s Organizer
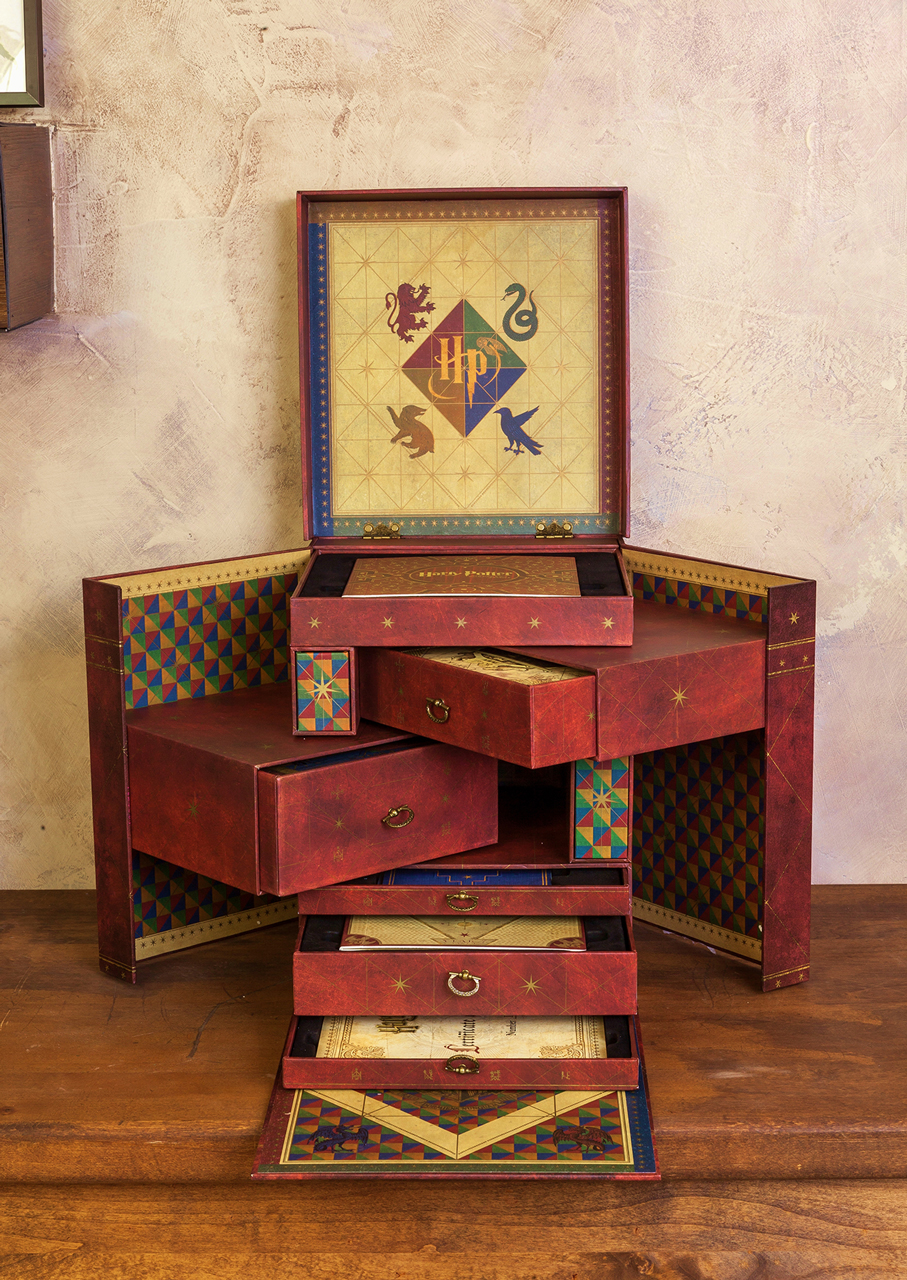
This wizarding organizer box was inspired by the box for the Harry Potter Wizard’s Collection BluRay/DVD set. That was inspired by the Weasley’s Skyving Snackbox as seen in the movies and at the Wizarding World of Harry Potter.
The DVD set:
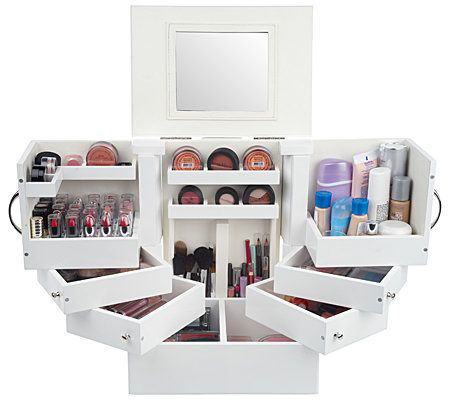
When we spotted the Lori Greiner Make-up Organizer at our local Bed, Bath & Beyond with its many drawers and white finish, it seemed like a blank canvas just waiting to be re-imagined & re-purposed into a magical Wizard’s box.
To start, assemble your materials. You will need:
- Antique white acrylic paint
- Gold acrylic paint
- Dark. Green acrylic paint
- Dark. Blue acrylic paint
- Burgundy acrylic paint
- Small shallow containers for paint
- Narrow paint brushes
- Antique white spray paint
- Burgundy spray paint
- Painters tape
- Rags
- Metallic gold paint marker
- Pencil
- Ruler
- ArtMinds Antique Wax
- Small hacksaw
- Small ring drawer pulls
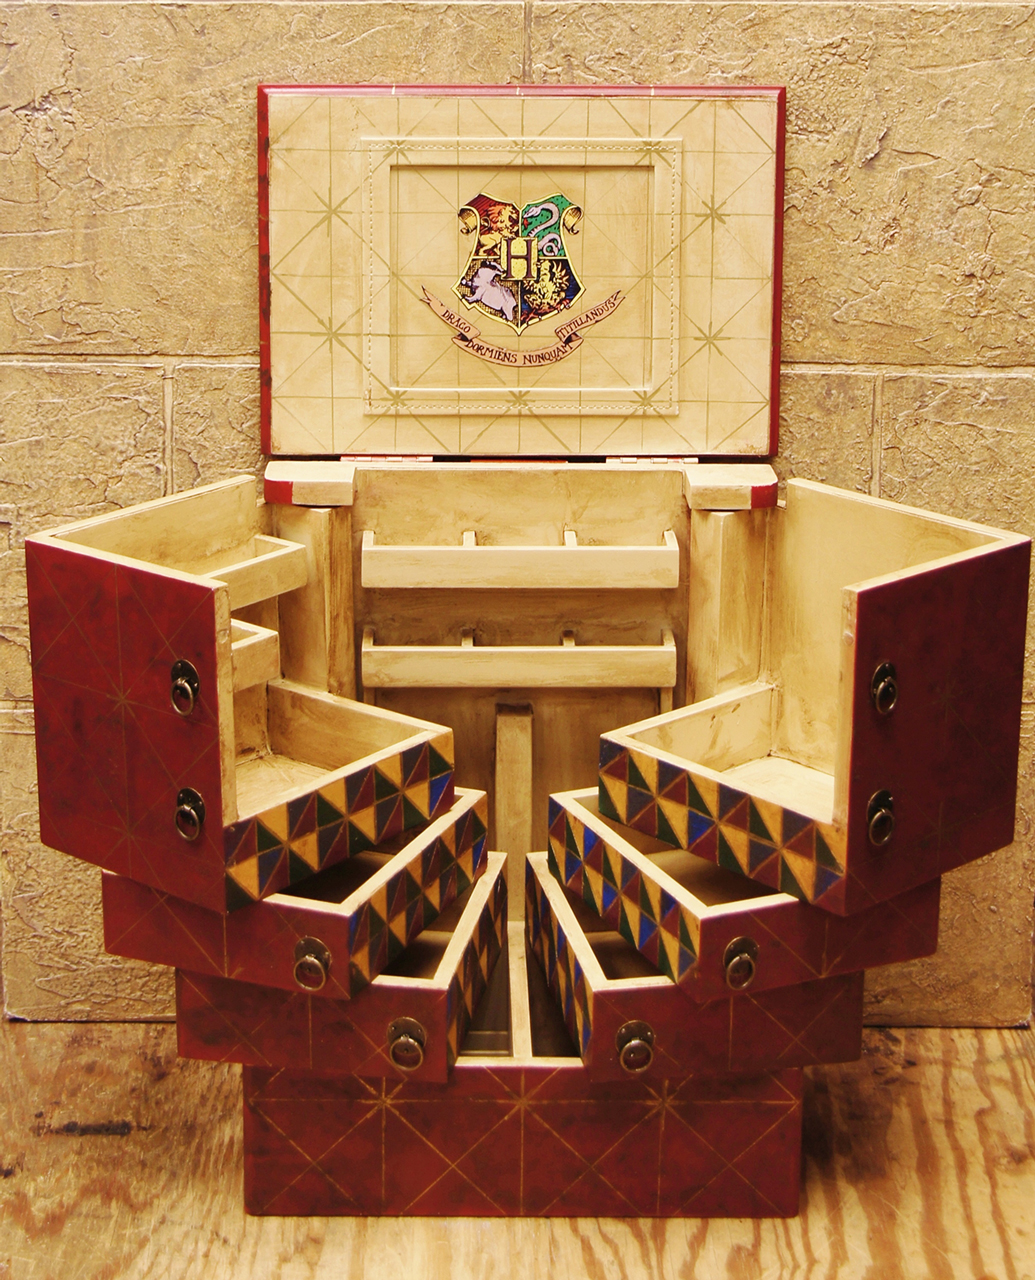
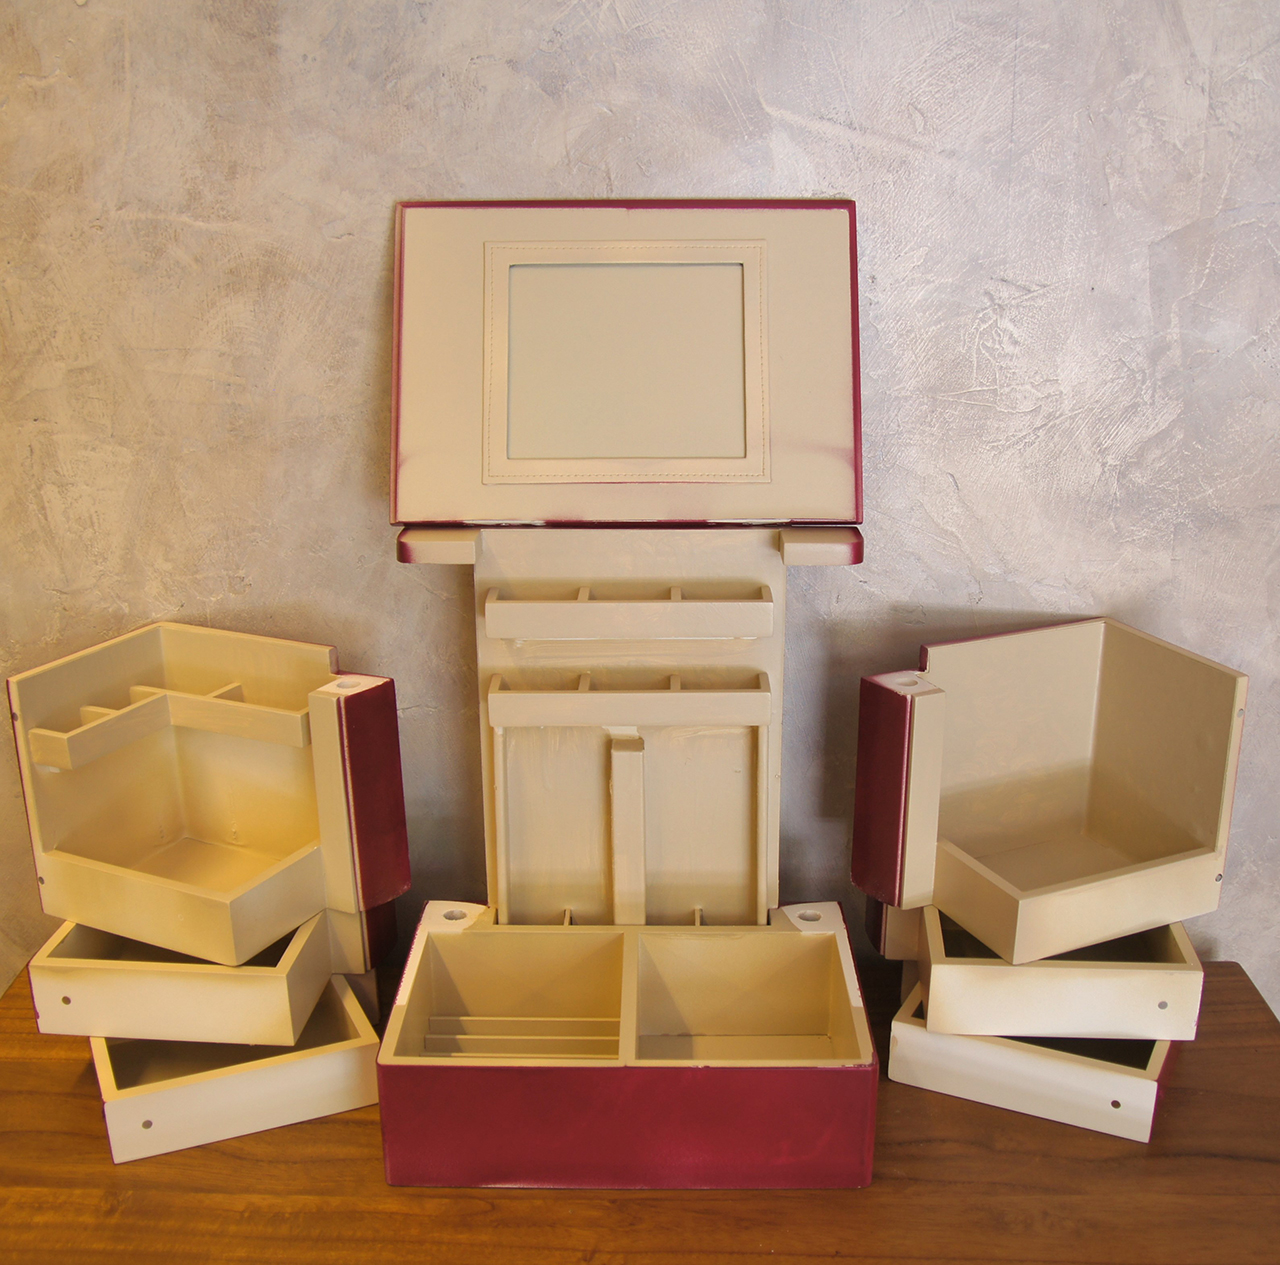
We started by using the hacksaw to cut through the wooden dowels that were acting as hinges where the drawers turn out. That let us take the box apart so that we could paint it. We taped off the edges and painted everything on the inside of each section with a cream colored spray paint. We had to go over this with some cream acrylic crafting paint to get into all the nooks and crannies. We also painted over the mirror.
We then stacked the box back together and painted the outside carefully with a deep red spray paint.
Now for the diamond pattern on the inside of the drawers.
We measured off the area into equal squares and triangles in pencil.
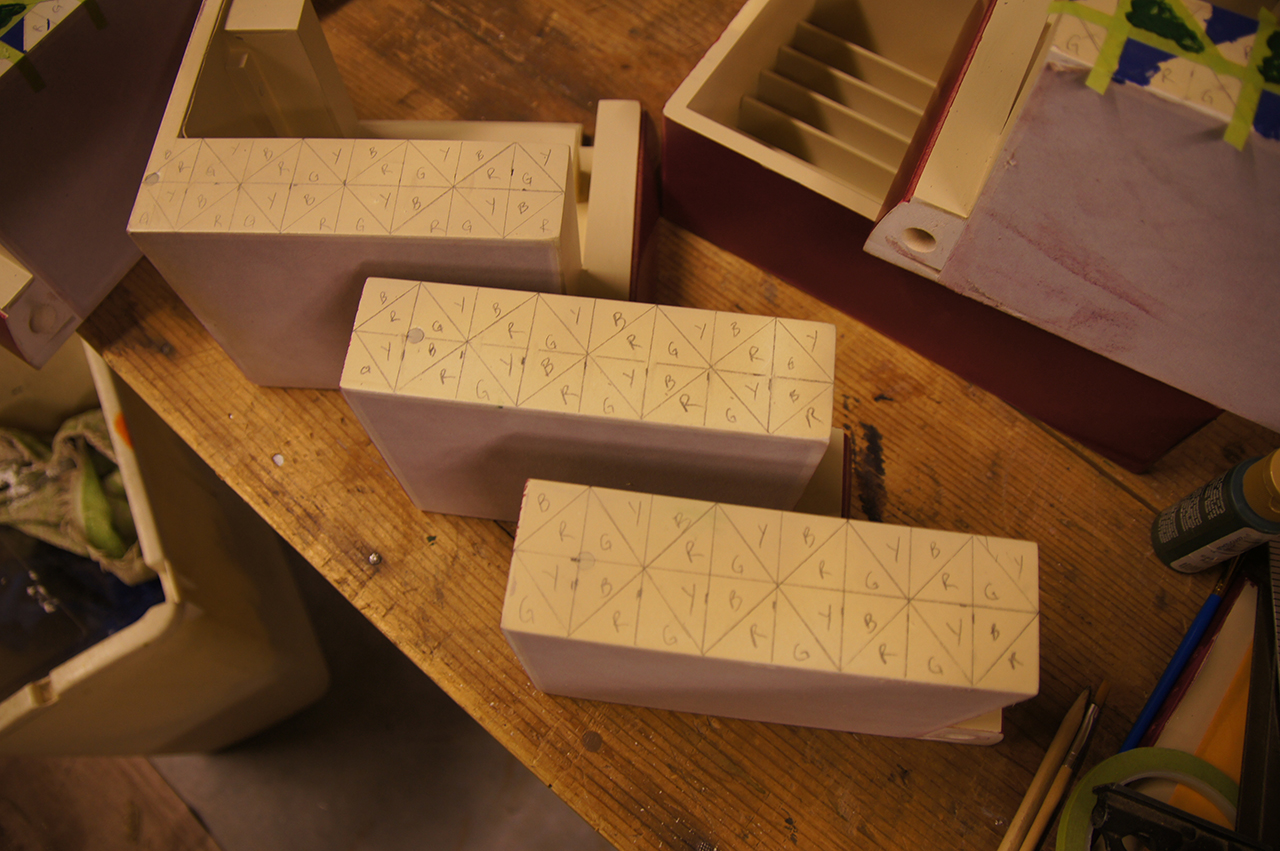
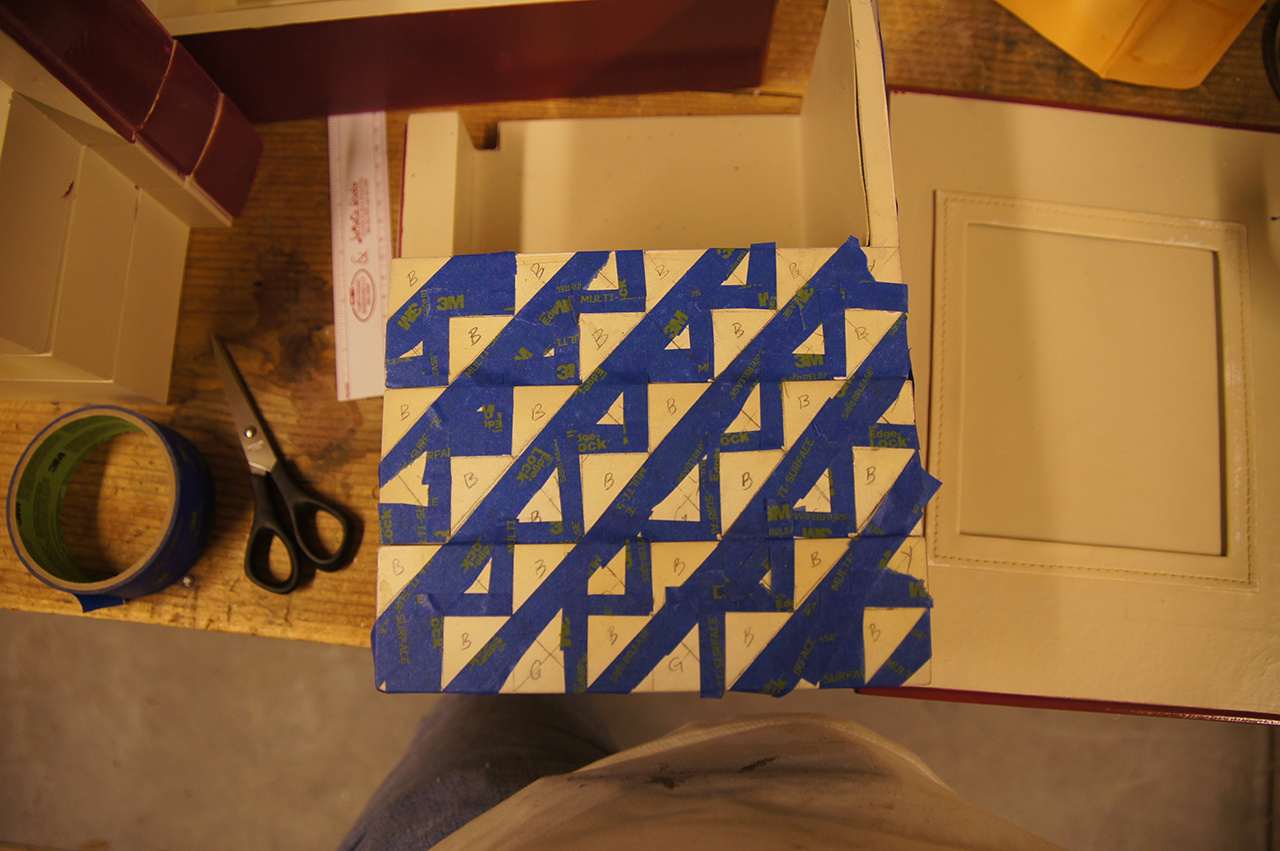
Then we taped off the edges of one color at a time and painted that color. Let it dry well between each color so the tape doesn’t pull the paint off. Re-tape to paint each color in turn.
On the finished pattern, the colors will be bright, but they will darken up after we antique the box.
Next, measure off the outside of the box into equal squares and mark for the gold lines in pencil. Note that some of the squares will fall across the edges of the drawers. With a careful hand and a ruler, use the gold marker to go over the lines. Draw a small star shape at the junction of the squares.
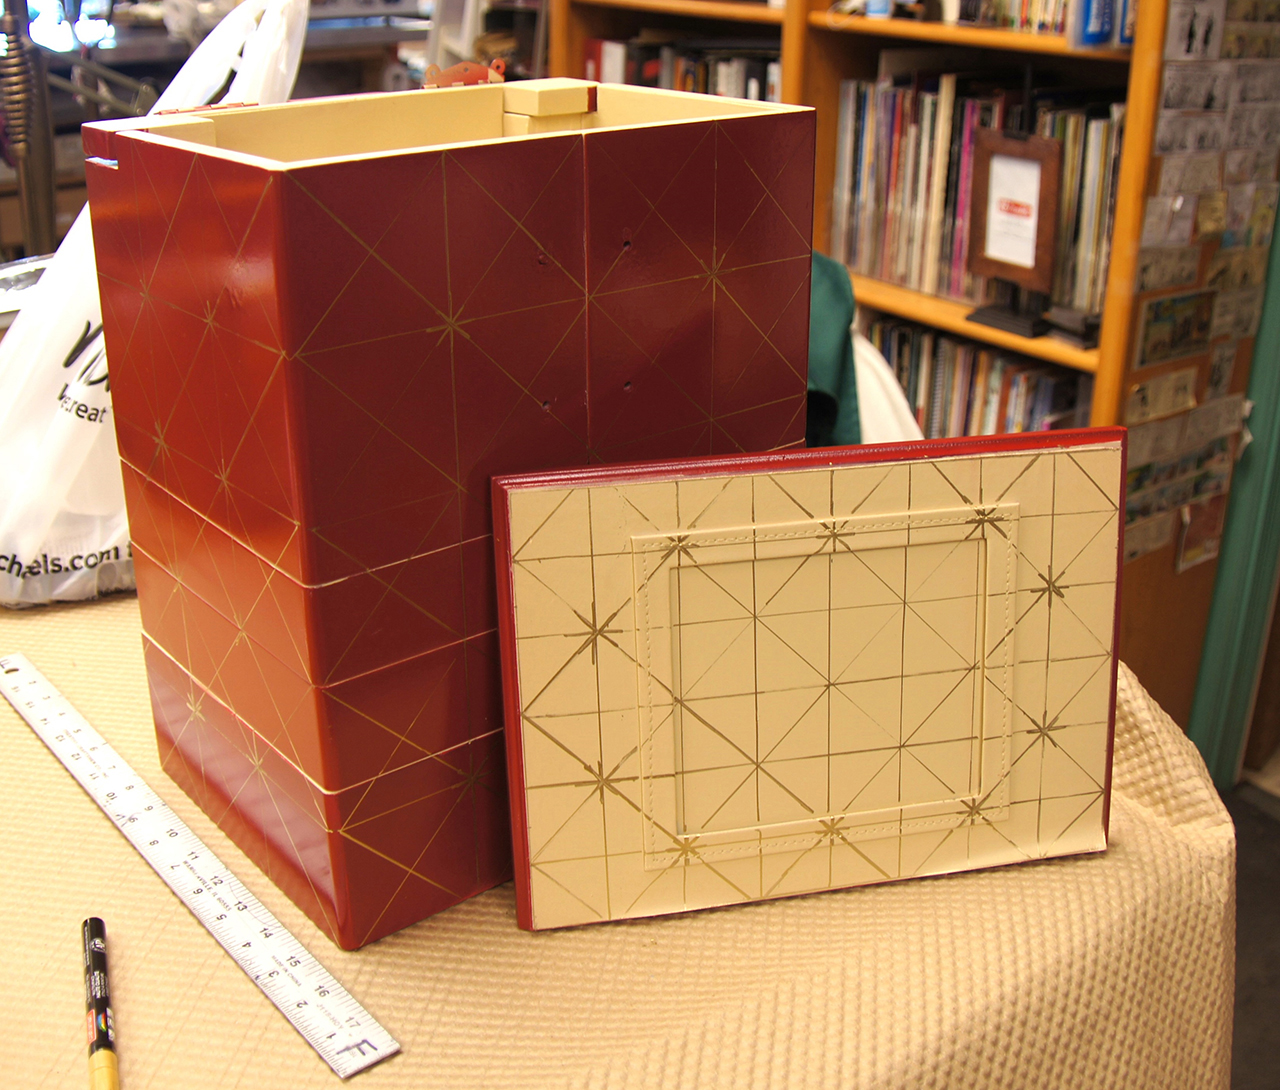
We marked the gold squares onto the inside of the lid and outlined the earlier colored pattern on the inside of the drawers with gold as well.
Wax the entire box inside and out with the Antique wax to give it a nice finish. This wax paint is made for use with chalk paint and is water-based so it will not remove other paints the way oil-based wax can. If you need to even out the Antique color, then go over the brown wax with a clear wax and rub it around a bit. Allow the wax finish to dry.
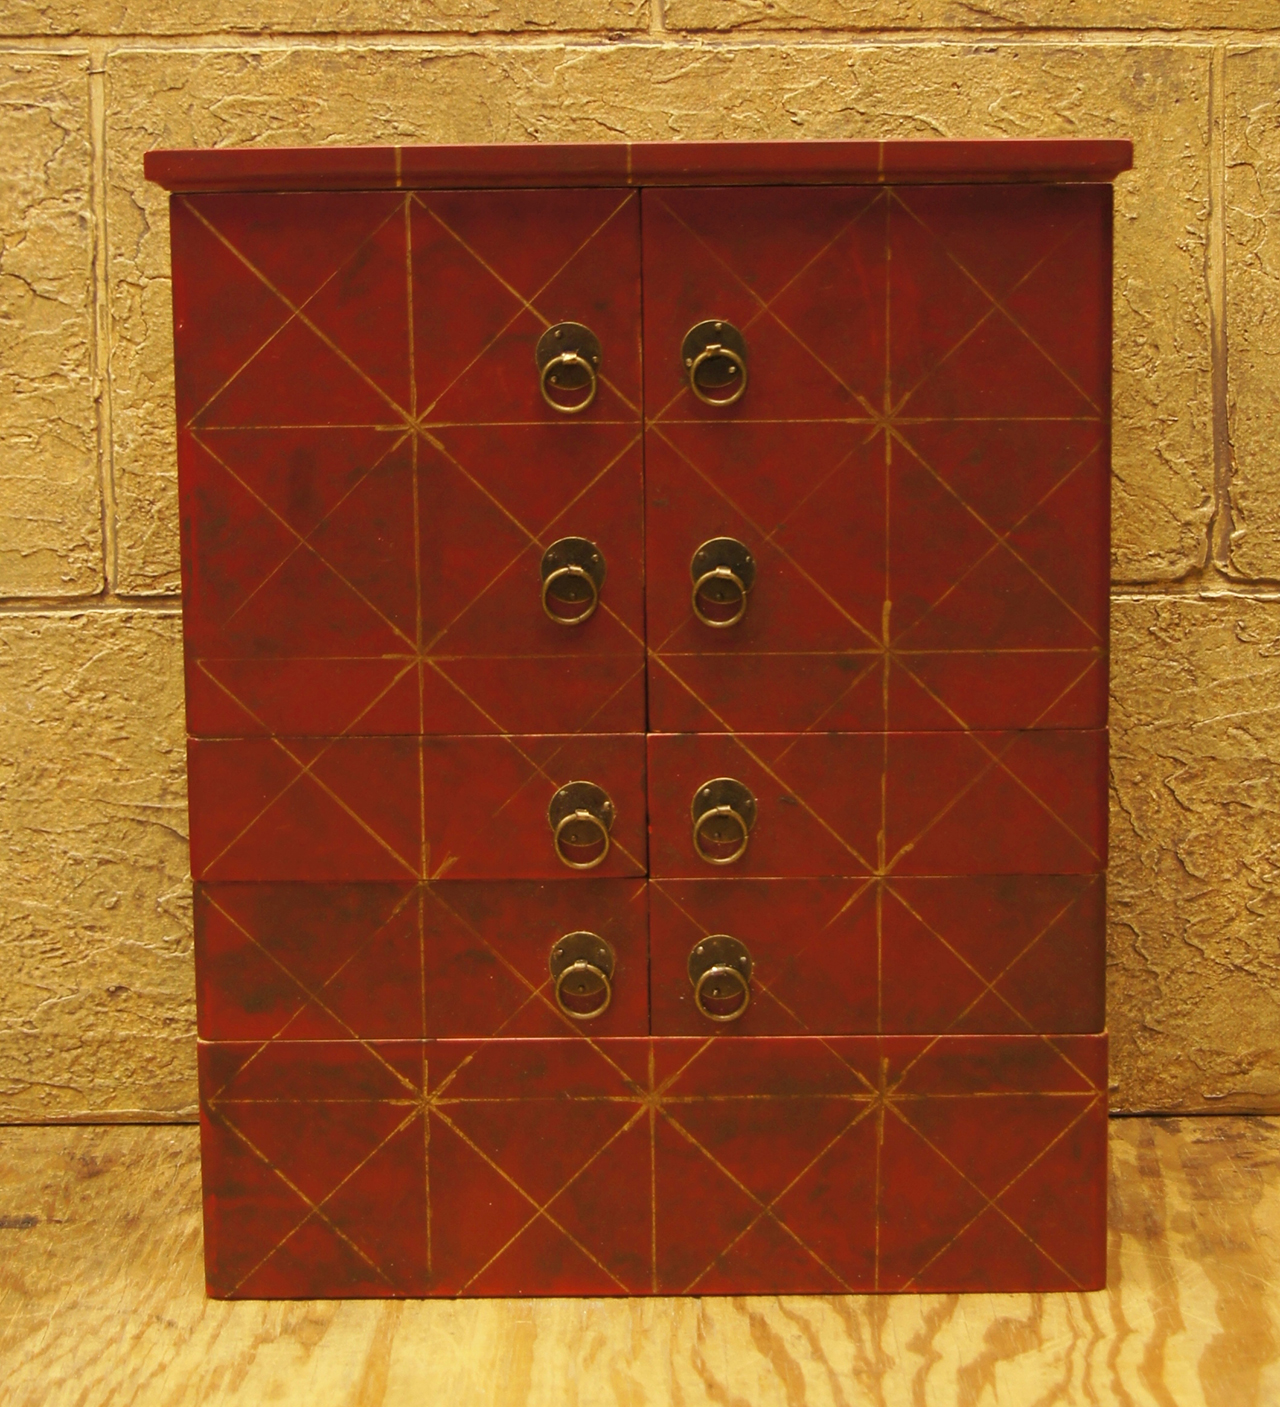
We added small antique brass pull rings to look as much as possible like our inspiration piece.
The last step is to apply a decal to the inside of the lid. The decal we found was printed on white vinyl, so we trimmed it to the edge of its printing. Apply this using the gold lines as guides to get it straight.
We wiped a light coating of brown wax over this to blend it in with the rest of the box.
We reassembled the box using the same dowel that we cut off by putting a spring down into the hole before forcing the rod back under the lip at the top. Put the lid back on with the original screws and you are done.
Accio Organizer!
Date
July 21, 2016
Category
Magical
Travis Mohr
June 12, 2020at12:36 amWow! You should totally make them and sell them! I know I would be very interested in buying it!